
搭建deepseek并且显示思考过程
效果预览


获取服务器
略
安装宝塔面板
略
申请api
可以使用我的邀请链接,进去会赠送一些积分
这个网站很良心,每天签到会赠送2000
注册链接
创建api
小技巧:在选择模型的地方先打一个d可以提高选择效率,选择所有deepseek开头的模型,也可以把gpt3.5和gpt3.5-16k选上,这样的话可以顺便用上这两个便宜模型
记住你的apikey,待会儿要用
docker安装openwebui
open-web-ui是一个具有丰富功能的ai对话框架,支持本地ai或者调用api
首先拉取镜像
国外的vps网络环境比较好,国内的可能要使用镜像
4个G下的比较久,需要等待
接下来创建容器,将容器内部的端口映射出来
然后去防火墙放行端口,可以顺便把9099放了,后面会用到
等待几分钟,这玩意儿很大,启动需要一会儿
使用ip+端口的方式访问,进去之后创建管理员账户
配置api
使用管理员登陆之后,右上角头像,选择设置,设置中文
还是同样的地方,选择管理员设置,进去之后点击外部链接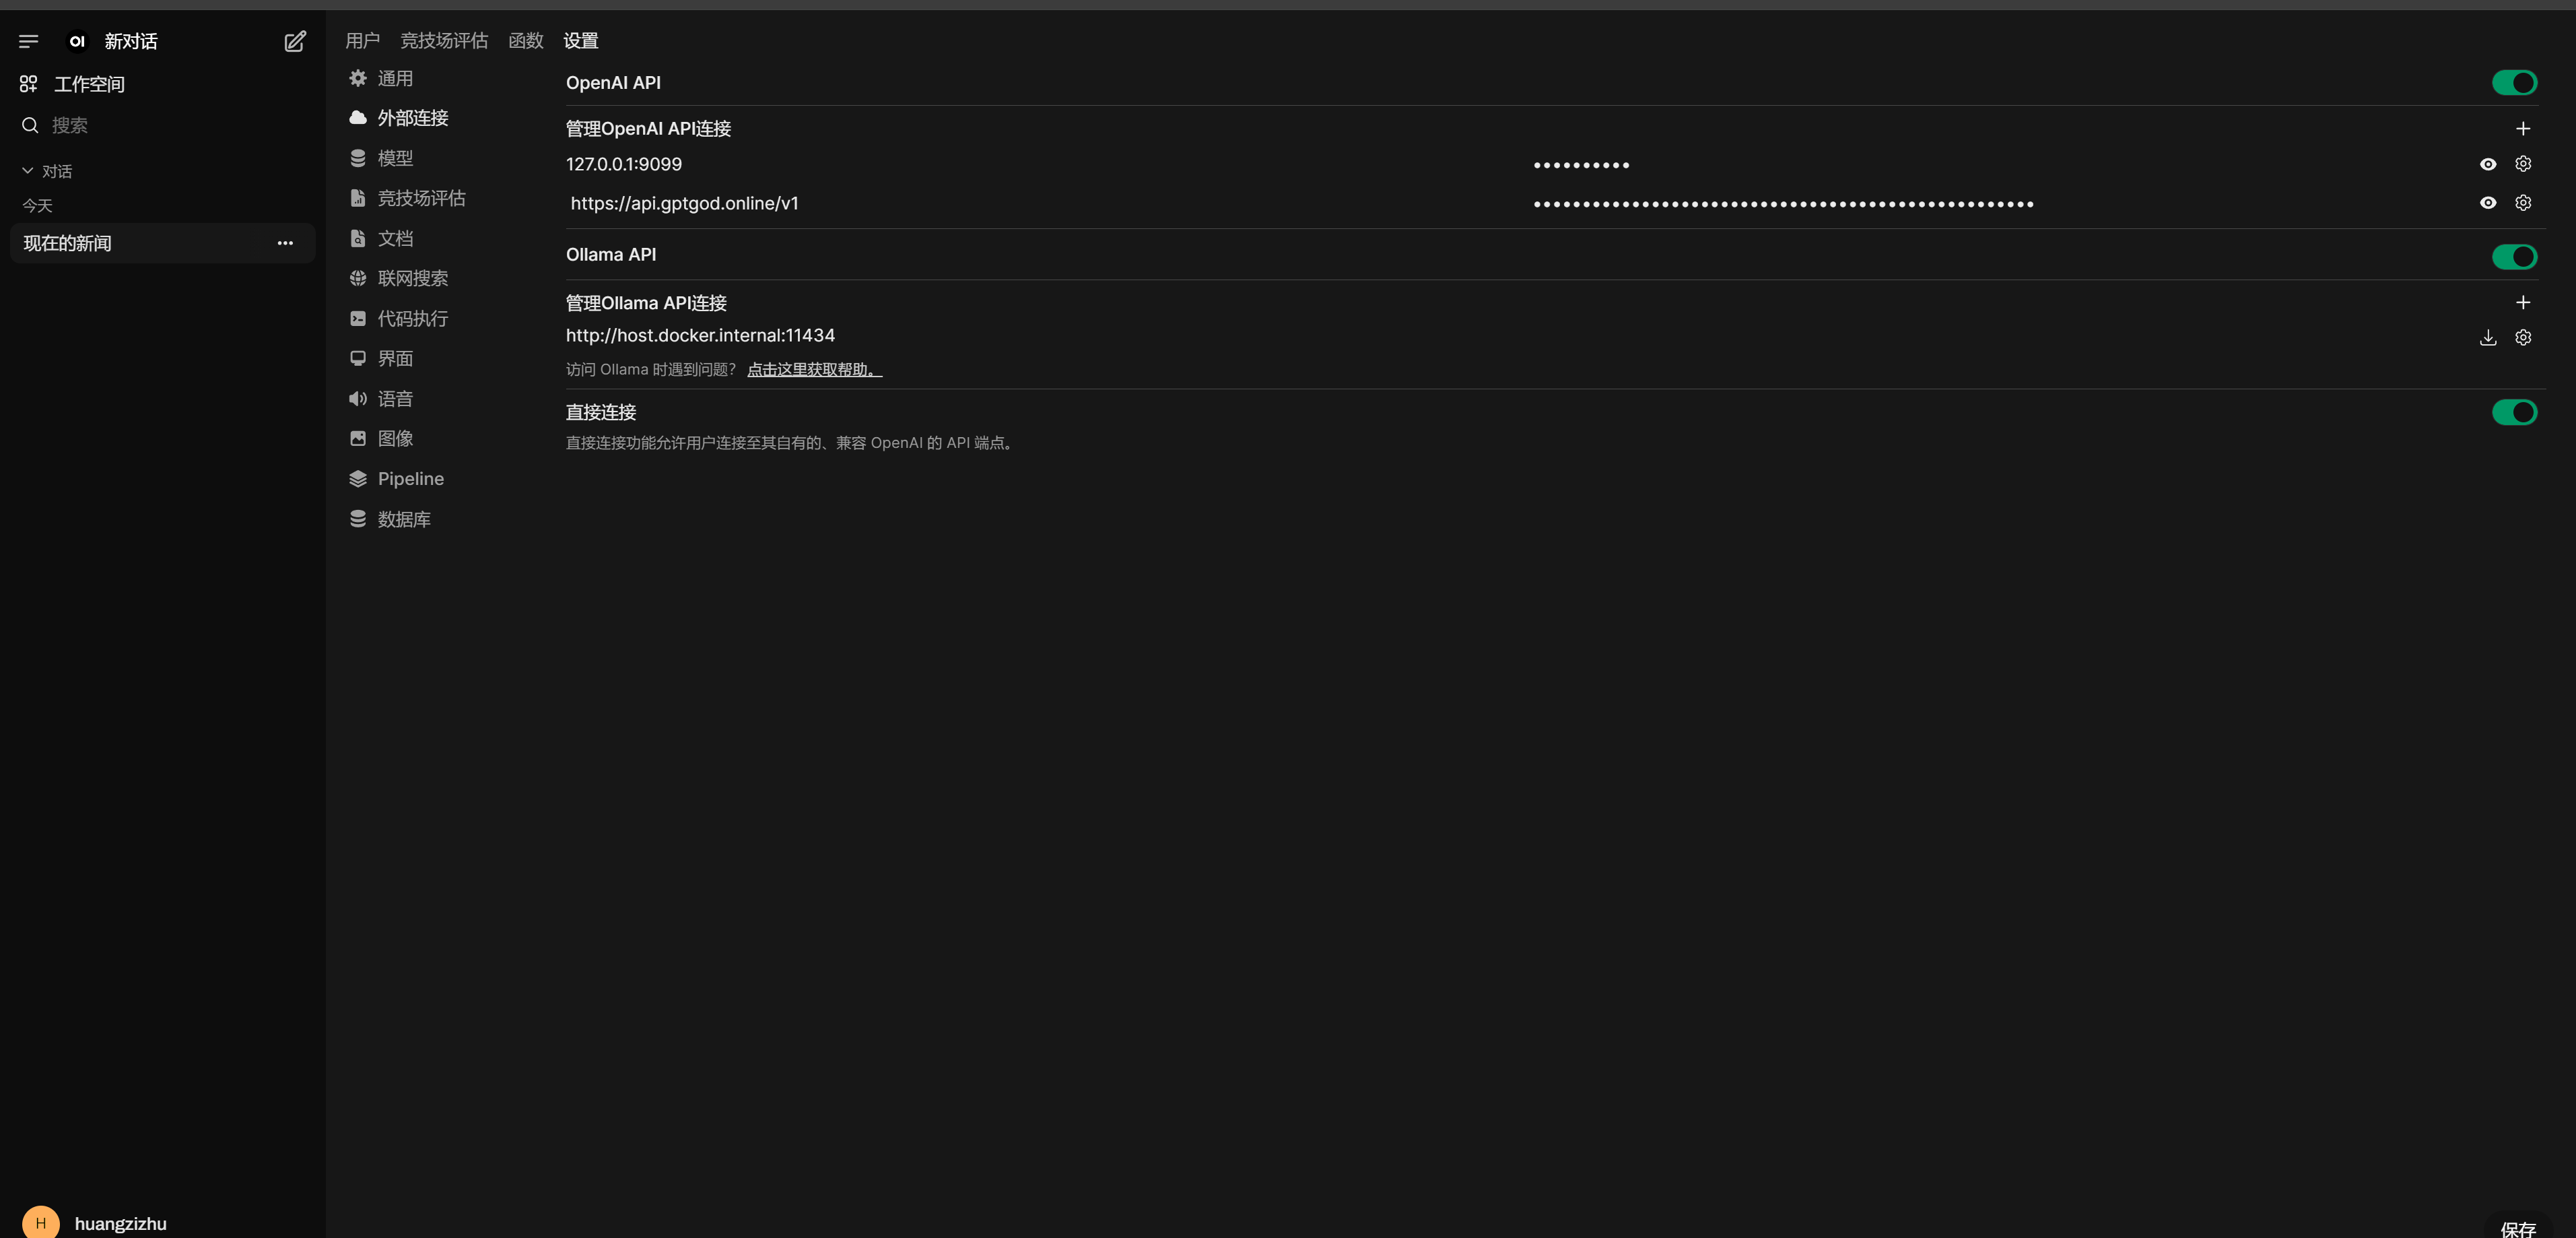
如图,api基础地址填写https://api.gptgod.online/v1/
apikey填写上文提到的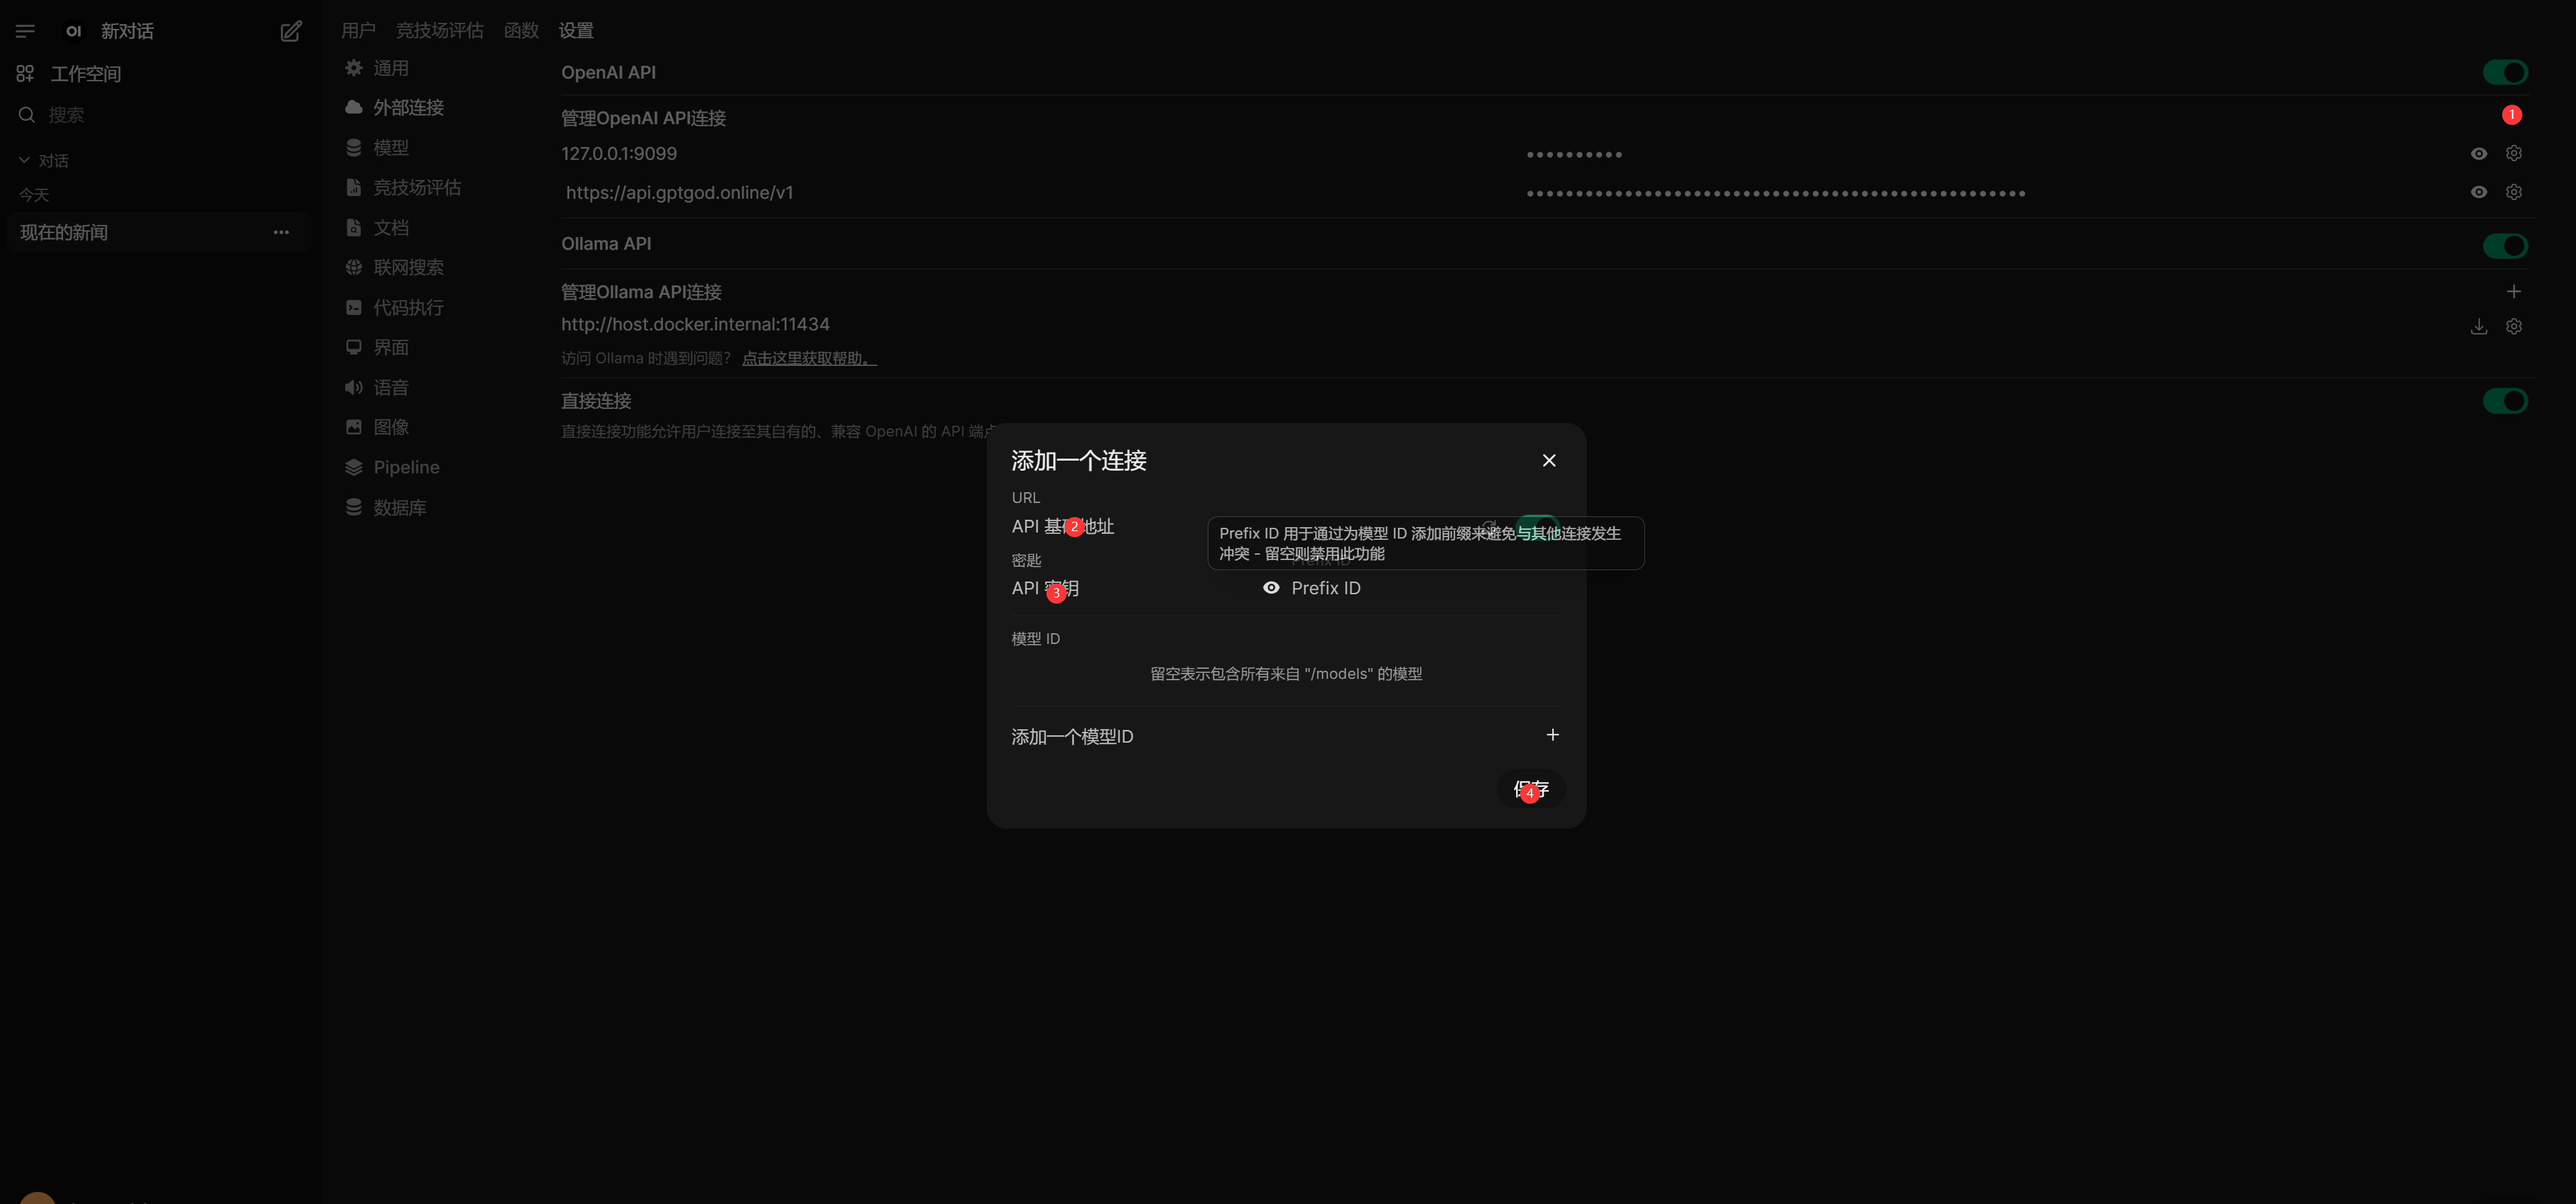
此时api配置完成,左上角创建新对话试一下,看看能不能选择模型,能选择就进行对话试试,可以的话到这里配置就完成了
拓展:显示思考过程
虽然可以调用api进行对话了,但是还是无法展示思考过程,在思考过程结束之前都不会显示任何内容,个人感受就是相应很慢
接下来我们进行完善
像和之前一样,我们创建一个docker管道pipelines
但是镜像搜索一般搜不到,我们直接使用命令创建
docker run -d -p 9099:9099 --add-host=host.docker.internal:host-gateway -v pipelines:/app/pipelines --name pipelines --restart always ghcr.io/open-webui/pipelines:main

等待创建完成,如果前面跟着做了,已经放行了9099端口的就不用了。
在 管理员设置 外部连接 中按 +添加一个连接。
管道地址通过内网 IP、hostname 或域名等,加上前面 pipelines 容器的端口号 9099(跟着我们的教程走也就是127.0.0.1:9099)(:是英文);密钥是固定的
0p3n-w3bu!

然后再相同的界面添加函数
函数内容在下面
import json
import httpx
import re
from typing import AsyncGenerator, Callable, Awaitable
from pydantic import BaseModel, Field
import asyncio

class Pipe:
    class Valves(BaseModel):
        DEEPSEEK_API_BASE_URL: str = Field(
            default="https://api.deepseek.com/v1",
            description="DeepSeek API的基础请求地址",
        )
        DEEPSEEK_API_KEY: str = Field(
            default="", description="用于身份验证的DeepSeek API密钥,可从控制台获取"
        )
        DEEPSEEK_API_MODEL: str = Field(
            default="deepseek-reasoner",
            description="API请求的模型名称,默认为 deepseek-reasoner",
        )
        DEEPSEEK_MODEL_DISPLAY_NAME: str = Field(
            default="deepseek-reasoner-fix",
            description="模型名称,默认为 deepseek-reasoner-fix",
        )

    def __init__(self):
        self.valves = self.Valves()
        self.data_prefix = "data:"
        self.emitter = None

    def pipes(self):
        return [
            {
                "id": self.valves.DEEPSEEK_API_MODEL,
                "name": self.valves.DEEPSEEK_MODEL_DISPLAY_NAME,
            }
        ]

    async def pipe(
        self, body: dict, __event_emitter__: Callable[[dict], Awaitable[None]] = None
    ) -> AsyncGenerator[str, None]:
        """主处理管道(已移除缓冲)"""
        thinking_state = {"thinking": -1}  # 使用字典来存储thinking状态
        self.emitter = __event_emitter__

        # 验证配置
        if not self.valves.DEEPSEEK_API_KEY:
            yield json.dumps({"error": "未配置API密钥"}, ensure_ascii=False)
            return

        # 准备请求参数
        headers = {
            "Authorization": f"Bearer {self.valves.DEEPSEEK_API_KEY}",
            "Content-Type": "application/json",
        }

        try:
            # 模型ID提取
            model_id = body["model"].split(".", 1)[-1]
            payload = {**body, "model": model_id}

            # 处理消息以防止连续的相同角色
            messages = payload["messages"]
            i = 0
            while i < len(messages) - 1:
                if messages[i]["role"] == messages[i + 1]["role"]:
                    # 插入具有替代角色的占位符消息
                    alternate_role = (
                        "assistant" if messages[i]["role"] == "user" else "user"
                    )
                    messages.insert(
                        i + 1,
                        {"role": alternate_role, "content": "[Unfinished thinking]"},
                    )
                i += 1

            # yield json.dumps(payload, ensure_ascii=False)

            # 发起API请求
            async with httpx.AsyncClient(http2=True) as client:
                async with client.stream(
                    "POST",
                    f"{self.valves.DEEPSEEK_API_BASE_URL}/chat/completions",
                    json=payload,
                    headers=headers,
                    timeout=300,
                ) as response:
                    # 错误处理
                    if response.status_code != 200:
                        error = await response.aread()
                        yield self._format_error(response.status_code, error)
                        return

                    # 流式处理响应
                    async for line in response.aiter_lines():
                        if not line.startswith(self.data_prefix):
                            continue

                        # 截取 JSON 字符串
                        json_str = line[len(self.data_prefix) :]

                        # 去除首尾空格后检查是否为结束标记
                        if json_str.strip() == "[DONE]":
                            return

                        try:
                            data = json.loads(json_str)
                        except json.JSONDecodeError as e:
                            # 格式化错误信息,这里传入错误类型和详细原因(包括出错内容和异常信息)
                            error_detail = f"解析失败 - 内容:{json_str},原因:{e}"
                            yield self._format_error("JSONDecodeError", error_detail)
                            return

                        choice = data.get("choices", [{}])[0]

                        # 结束条件判断
                        if choice.get("finish_reason"):
                            return

                        # 状态机处理
                        state_output = await self._update_thinking_state(
                            choice.get("delta", {}), thinking_state
                        )
                        if state_output:
                            yield state_output  # 直接发送状态标记
                            if state_output == "<think>":
                                yield "\n"

                        # 内容处理并立即发送
                        content = self._process_content(choice["delta"])
                        if content:
                            if content.startswith("<think>"):
                                match = re.match(r"^<think>", content)
                                if match:
                                    content = re.sub(r"^<think>", "", content)
                                    yield "<think>"
                                    await asyncio.sleep(0.1)
                                    yield "\n"

                            elif content.startswith("</think>"):
                                match = re.match(r"^</think>", content)
                                if match:
                                    content = re.sub(r"^</think>", "", content)
                                    yield "</think>"
                                    await asyncio.sleep(0.1)
                                    yield "\n"
                            yield content

        except Exception as e:
            yield self._format_exception(e)

    async def _update_thinking_state(self, delta: dict, thinking_state: dict) -> str:
        """更新思考状态机(简化版)"""
        state_output = ""

        # 状态转换:未开始 -> 思考中
        if thinking_state["thinking"] == -1 and delta.get("reasoning_content"):
            thinking_state["thinking"] = 0
            state_output = "<think>"

        # 状态转换:思考中 -> 已回答
        elif (
            thinking_state["thinking"] == 0
            and not delta.get("reasoning_content")
            and delta.get("content")
        ):
            thinking_state["thinking"] = 1
            state_output = "\n</think>\n\n"

        return state_output

    def _process_content(self, delta: dict) -> str:
        """直接返回处理后的内容"""
        return delta.get("reasoning_content", "") or delta.get("content", "")

    def _format_error(self, status_code: int, error: bytes) -> str:
        # 如果 error 已经是字符串,则无需 decode
        if isinstance(error, str):
            error_str = error
        else:
            error_str = error.decode(errors="ignore")

        try:
            err_msg = json.loads(error_str).get("message", error_str)[:200]
        except Exception as e:
            err_msg = error_str[:200]
        return json.dumps(
            {"error": f"HTTP {status_code}: {err_msg}"}, ensure_ascii=False
        )

    def _format_exception(self, e: Exception) -> str:
        """异常格式化保持不变"""
        err_type = type(e).__name__
        return json.dumps({"error": f"{err_type}: {str(e)}"}, ensure_ascii=False)
复制进去就行
点击新创建的函数的对应的设置按钮,进去填写参数
和前面的api填写一样依次是
api url :https://api.gptgod.online/v1/
apikey: 你的apikey
模型名称:deepseek-r1 (需要调用哪个模型就用哪个比如后面的net-deepseek-r1就是调用联网的r1)
展示的名称

记得把函数设为启用
然后去模型哪里启动这个模型,可能有两个模型都叫一样的名字,一个就是直接调用api的,另一个就是有思考过程的,自己选择一下然后去测试一下就行
在思考的时候会有一个箭头,展开就是
至此,所有配置都已经结束,这里面还有别的很多功能,比如创建用户,就可以邀请你的朋友一起使用,还有给模型加上标签和简介。。。。代由读者自行探索。
非常好教程,使我的ds旋转
那你是这个👍